navegar internet vpntraffic ubuntu
navegar internet vpntraffic ubuntu
STEP 1:
You need to install 2 packages, use Synaptic or the Command line if you prefer (If you do the first, it will install the second as a dependency):
network-manager-pptp
pptp-linux
Click on:
Network Connection icon –> VPN Connections –> Configure VPN

At the Network Connections window click on: Add
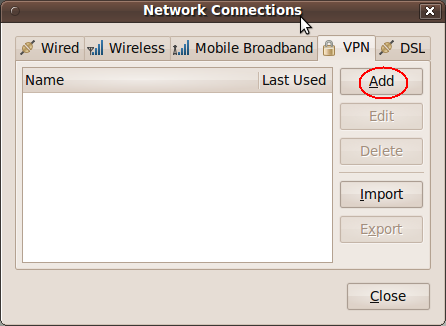
Click on: Create

STEP 2:
Once you click on “Create” you to get the edit window, these are its sections explained:
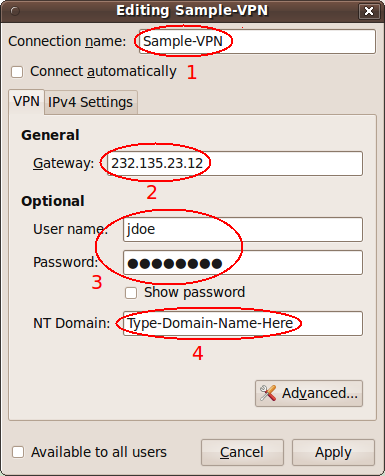
1) Connection Name: Type VPNMaster here.
2) Gateway: Enter the server address here.
3) Username and Password: Enter Username and password of the VPN network you are connecting to.
4) NT Domain: Leave this field empty.
STEP 3:
Click on the “Avanced” button
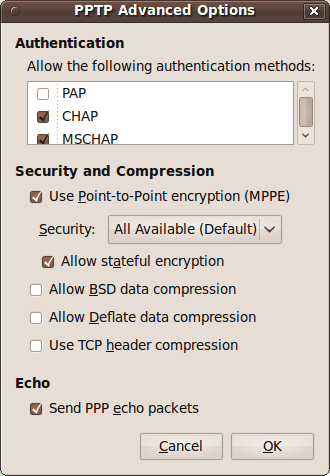
Under the “Authentication” section
- Uncheck PAP and EAP
- Check CHAP, MSCHAP, MSCHAPv2
- Check “Use Point-to-Point encryption (MPPE)”
- Select the type of encryption used on you network. Usually “128-bit (most secure)”
- Uncheck all other settings except “Send PPP echo packets”
- Click “OK”
STEP 4:
**optional**
Entering routes:
Back on the Ubuntu VPN client editing window…
- Click on the IPv4 settings tab
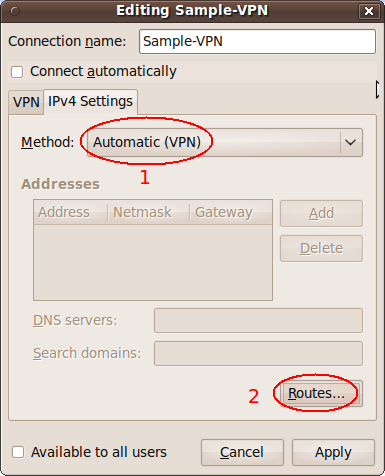
1) Leave Method on “Automatic VPN”
2) Click on Routes
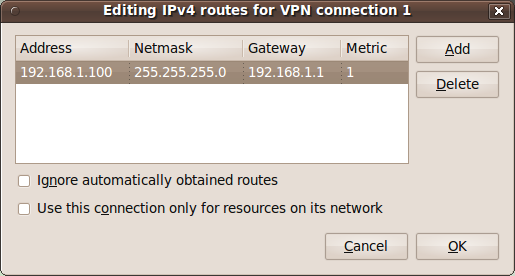
1) Address: Enter the internal IP address of the machine you want to connect to
2) Netmask: Netmask of the remote network
3) Gateway: Gateway of the remote network (Usually internal IP address of remote router)
4) Metric: Set Metric to 1
Once you finish reboot your computer and you are done!
What you need is a VPN account !
Before you make an order, you can Trial our VPN Service for 3 days.
• Only $1.99
• High Speed
• All country server

|
$5 Package = 1 Account = VPN servers of US, AU, UK, CA, RU, Italy, Japan, Korea, HK, etc.
One Year/365 days
|
|
|
Multi-VPN server package include:
|


 US
US  UK
UK  CA
CA 

 France


.gif) Germany
Germany 

 Ireland
 Romania

 Ukraine
  Hong Kong
 Philippines
 Thailand
  Indonesia
 China
China  Singapore

 Korea
Korea  Mexico
  United Arab Emirates
  Turkey

 Cyprus
 Argentina
  Chile
Chile 


 Kenya
Kenya